I am not a fan of folding clothes. That’s why I end up digging through a basket full of clean laundry to find socks before I take on the task of folding the last 4 loads that have accumulated. It isn’t laziness, it’s just not a chore I particularly find pleasure in. Until now.
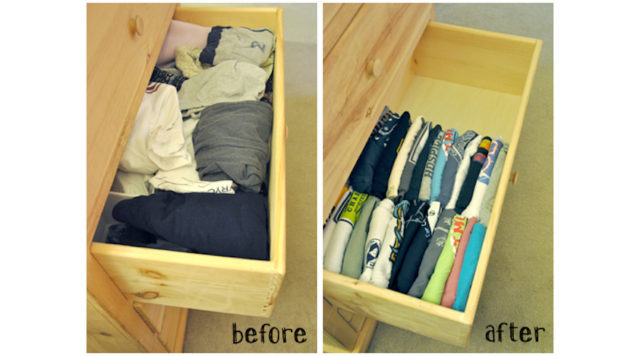
Recently I was going through my clothes, putting together a pile to be donated, and I was frustrated with my t-shirt drawer. No matter how carefully I folded them, they were never the same size and they didn’t fit into the drawer the way my OCD brain feels they should.
Then I remembered the t-shirt folding contraptions they have in many retail stores. The ones that fold a perfect shirt in seconds, leaving perfect, even stacks of pristine cloth with crisp edges… ahhhhhhh. But I digress.
My nostalgia took me to the internet, where I searched for a DIY version of those fancy devices. Every time I found one, though, I was struck by how they just felt more complicated than they needed to be. That’s when I put on my thinking cap and took matters into my own hands.

The photos above show the contraption I constructed out of a cardboard box. It is basic, simple, and not very pretty to look at. But it works magic. Here’s how I did it:
- Did some math.
I measured the inside dimensions of the t-shirt drawer. Because I knew that I wanted to fit six stacks of shirts in the drawer, I divided the width (front to back) measurement in half, and the length (side to side) measurement in thirds. - Did some cutting.
My figures told me that I wanted each finished shirt to measure 9” x 8”. Armed with those numbers, I found a clean cardboard box and cut three equal-sized pieces measuring 9” wide and 16” long. - Did some taping.
The next, and final, step was to use packing tape to hinge the three pieces together. I left a gap of about 1/2” between the sections, and applied tape to both sides. - Did some folding.
Less than 15 minutes later, I folded my first t-shirt using my fancy new time (and sanity) saving device.
NOTES: The biggest change in my design from the ones I saw others make is that I only use three panels of cardboard, while all the designs I saw online used six. I didn’t feel it necessary, when I could quickly fold the bottom half of the shirt upward to meet the bottom of the cardboard.
In the end, my t-shirt drawer is much neater and more organized. I found that it works equally well with my short-sleeve knit and button-up shirts as well. Eventually I’ll probably remake it to make it look a little less like something I rescued from the recycling bin, but right now I’m happy that it does its job and makes my life a little easier.
Note: My Earth Garden


